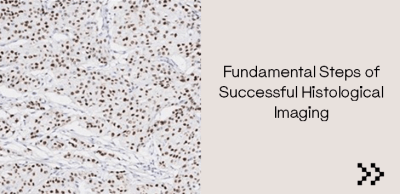
Histology and digital pathology provide a critical clinical service for diagnostics, as well as for research and drug discovery. Visikol typically characterizes client samples by preparing thin tissue sections, staining with histological stains or immunohistochemistry, and visualization via brightfield or fluorescent microscopy. Furthermore, Visikol’s proprietary clearing kits enable rapid clarification of tissue samples which, when paired with molecular probes or immunolabeling, select biomarkers, cells, and regions can be reconstructed in 3D for analysis. Effective disease treatment is based on accurate diagnoses of symptoms and laboratory analysis facilitating diagnoses or new drug discoveries start with consistent histological procedures.
Since the inception of the microscope, researchers and clinicians have characterized tissues qualitatively through the process of embedding, sectioning, staining and evaluation with a microscope. Prior to these frequently highlighted stages leading to the creation of histology slides, there are small but consequential steps including the fixation of fresh tissue samples.
Preserving Tissue
Once tissues are removed from a living species the proper environmental conditions (such as oxygen levels, hydration, and waste removal) that sustain the cells of an organ are lost. The tissues quickly begin to degrade due to cell death and autolysis via their own cellular enzymes and putrefaction, destruction by bacteria or fungi. Tissues undergo osmotic shock, leading to distortion of tissue structures or shrinkage. To preserve the confirmation of the cellular proteins in a life-like manner, often the tissue samples are chemically fixed, most commonly with the liquid fixing agent formalin. Additionally, tissue fixation will allow for thin sectioning of tissue by hardening tissue, deactivates infectious agents (except prion diseases) and will enhance cell compatibility for special stains. Formalin fixation is the process of applying formalin, 10% neutral (phosphate) buffered formalin or NBF, to a sample for long enough to permit complete penetration of the sample and to allow adequate time for the formalin to bind with the uncharged amino groups of aldehydes. Dependent on the tissue sample density, the diffusion of formalin can be as slow as 1 mm per hour, which does not include the time required for the chemical reaction of fixation. This results in the formation of intra and inter-peptidyl crosslinks within the sample/tissue, with the outcome of mechanical stabilization and preservation of proteins and cellular organelles. Fixation furthermore removes bound water within tissues, thus optically improving the tissue refractive index for microscopic analysis. Use of 10% NBF is equated with low tissue shrinkage and good preservation of cellular detail. Each fixative has unique characteristics, including artifacts. The choice of an appropriate liquid fixation agent is based on intended histological analysis and goals. Generally, fixatives can be divided into categories based on their mechanism of action: strong cross-linkers, weak cross-linkers, coagulants, and combinations. The most common fixatives, besides formaldehyde (formalin), are paraformaldehyde (strong cross-linkers) and glyoxal (weak cross-linker). An alternative to chemical preservation of fresh tissue is to maintain frozen tissue throughout subsequent preparations and microtoming.
Several Considerations During Tissue Collection to Optimize Tissue Conditions for Histological Testing
- At no point in tissue collection or preparation should the sample be allowed to dry.
- New sharp razors and scalpels should be used for tissue collection to prevent ragged edges or tissue damage.
- Prior to fixation blood and mucus should be rinsed, or organs perfused with saline.
- Grossing of tissue to optimal size for proper fixation and analysis. Optimal sample size is 2-3 mm3. The volume of fixative should be 20-25 times the volume of the tissue, minimally 10:1 ratio.
- The fixation is temperature sensitive and optimized at neutral pH, with fixation increasing at higher temperature. Note: higher temperatures also increase creation of artifact during fixation.
- Have at least a single, or more, cut sides (capsule removal if possible) to facilitate fix penetration.
- Minimize time post-collection to initializing tissue fixation
- Tissue samples should be fixed for approximately 12 to 24 hours. Small samples as brief as 6 hours, and occasionally up to 72 hours for larger specimens.
- To enhance achievement of desired endpoints, tissue fixation is commonly 10% formalin, but other fixatives may be considered (including Zenkers Fixative, Bouins fixative, Helly’s fixative, Carnoy’s fixative, Glutaraldehyde, osmium tetroxide, cheomic aid, potassium dichromate, acetic acid, alcohols (ethanol, methanol), mercuric chloride and acetone.)
Tissue fixation is an early step that is critical for the preservation of a tissue specimen. It determines the level of sequential molecular integrity of the tissue, serving as the baseline for future analytical testing that guides a physician diagnosis and testing or provides illuminating data on potential new drugs.
Visikol’s immunohistochemistry team utilizes special stains to quantitatively assess staining, morphological features, and cell counts. The Visikol histology team provides conscientious attention to every step in the process, thus providing excellent stained samples to process data. Through the application of algorithms and digital pathology machine learning technique, Visikol produces quantitative histological results. This computational approach provides high throughput, excellent reproducibility, and quantitative metrics for evaluation of histological sections.
